
You’ve finally done it. After weeks of research, you purchased a power rack for your home gym. My team and I see this all the time; the boxes arrive, and the excitement to get lifting is palpable. You spend an afternoon putting it all together in your garage or basement. It looks solid. But when you rack your first heavy barbell after a warmup, you feel a slight shift - a little wobble that plants a seed of doubt in your mind. Is this normal? Is it safe?
As an expert who has spent over a decade helping people configure equipment and systems, I can tell you that this uncertainty is a major red flag. Especially here in Newark, as the cool September air pushes our workouts indoors, it's the perfect time to ensure your primary piece of safety equipment is assembled correctly. Before you start your fall and winter strength program, let's walk through the signs of an improper power rack assembly.
Common Signs and Symptoms
Identifying a problem is the first step toward fixing it. A properly assembled power rack should feel like a single, immovable object. If you notice any of the following, it’s time to investigate further.
- 1. The Obvious Wobble or Shifting: This is the most common complaint I hear. A slight wobble might not seem like a big deal with an empty bar, but that instability is magnified under a heavy load. A dangerous squat rack wobble causes the bar to become unpredictable during a lift, risking injury. The rack shouldn't sway side-to-side or rock front-to-back when you push on it or re-rack weights.
- 2. Uneven J-Hooks or Safety Arms: Place your J-hooks at the same height setting on both uprights. Now, place an empty barbell across them. Does it look perfectly horizontal? Use a small level on the barbell to be sure. If it's not level, it means the rack is twisted or "racked," forcing you to lift from an unbalanced position.
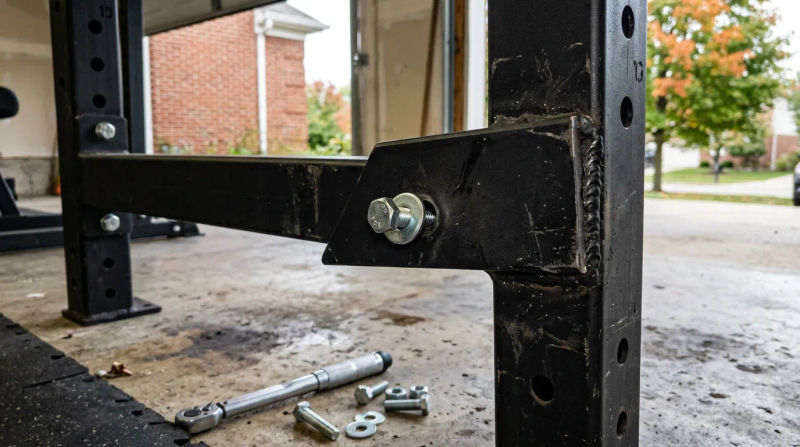
- 3. Bolts That Aren’t Seated Correctly: Take a close look at every nut and bolt. The head of the bolt and the washer/nut on the other side should be pulled tight and flush against the steel frame. If you see a gap, the bolt is too loose. Conversely, if the steel around the washer looks like it's bending or dimpling, the bolt may have been over-tightened, which can damage the structural integrity of the frame itself.
- 4. Visible Gaps Between Frame Components: Where the vertical uprights meet the horizontal crossmembers (especially at the base and top), the connection should be seamless. If you can see daylight through the joint or the pieces don't meet at a clean 90-degree angle, the rack is out of square.
- 5. The Rack Isn't Plumb and Level: This is a two-part check. "Level" refers to the horizontal plane. Are the base and top crossmembers parallel to the floor? "Plumb" refers to the vertical plane. Are the main uprights perfectly vertical? You can check both with a carpenter's level. An unlevel floor, common in the basements and garages of Newark's classic 1950s ranch-style homes, is a frequent culprit.
- 6. Difficulty Moving Attachments: Your J-hooks, spotter arms, and other attachments should slide in and out of the holes with minimal effort. If you have to fight to get an attachment in or find it binds on the way down, it’s a strong indicator that the two vertical uprights are not perfectly parallel to each other.
- 7. Strange Noises Under Load: A well-built rack is silent. If you hear creaking, groaning, or sharp popping sounds when you rack a heavy weight or during a movement like a pull-up, it means there is movement in the joints. Those noises are the sound of bolts shifting and metal components rubbing under stress.
What Causes This Problem
Understanding the root cause is key to creating a safe lifting environment. Most issues stem from just a few common mistakes during the assembly process.
The most significant factor is often the assembly sequence itself. Most manufacturers recommend only hand-tightening all the bolts first. This leaves enough play in the frame to get it perfectly square, level, and plumb. Once everything is aligned, you then go back and tighten all the bolts to their specified torque. Many people make the mistake of fully tightening each bolt as they go, which locks imperfections into place and is a primary source of squat rack wobble causes.
Another issue we often see in the Newark area is related to the homes themselves. Many of the charming split-level and ranch homes have tight stairwells or basement entrances. My team has seen it happen: a rack gets bumped and twisted just enough during the carry-in to throw off the alignment from the start. What seems like a minor bump can prevent components from seating correctly later.
Finally, let's talk about bolts. Every set of hardware has a recommended tightness, or torque. Under-tightening leaves the rack unstable, while over-tightening can strip the threads or even crush the steel tubing, creating a weak point. This is why knowing how to check rack bolt torque with a proper torque wrench isn't just for mechanics; it's a critical safety step for home gym owners. Using a standard wrench doesn't give you the feedback needed to get it just right.
When to Call a Professional
Many homeowners are perfectly capable of a DIY power rack assembly. However, the question becomes one of confidence and safety. Your power rack is the one piece of equipment you are trusting with your life during a heavy lift. There is no room for error.
You should consider calling an experienced professional if:
- You've completed the assembly, but you're experiencing one or more of the symptoms above and can't seem to fix it.
- You don't own a torque wrench and level, or you aren't comfortable using them to finalize the installation.
- The rack needs to be bolted down to a concrete or wood floor, and you're unsure about the correct anchoring procedure.
- You are moving and need your rack disassembled and then reassembled correctly in your new space.
- You simply want the peace of mind that comes from having an expert build and verify your setup. Think of it as the final item on your power rack safety checklist Newark - an expert sign-off.
A qualified professional can typically diagnose and assemble a rack in a fraction of the time it takes for a first-timer, ensuring every component is square, level, and torqued to spec for maximum safety and stability.
As you get ready to hit your goals this fall, take a few minutes to give your power rack a thorough inspection. Look for wobbles, check for level, and examine the hardware. Don't assume a little instability is normal. Addressing these small issues now prevents them from becoming big problems under a heavy barbell later.
If you notice any of these signs, contact a local professional for an inspection.